How to Clean Cat Ears with Olive Oil

Want to know how to clean cat ears using olive oil? You’ve come to the right place.
Cats are well known for their grooming habits and they love to keep themselves clean. Despite this, they may not be able to properly clean their own ears.
In this guide, we will discuss the importance of cleaning your cat’s ears and provide a step-by-step guide on how to clean cat ears with olive oil.
Why Should You Clean Your Cat’s Ears?
Regular cleaning of your cat’s ears is essential for maintaining their overall health and well-being. While cats are generally proficient at grooming themselves, their ears require extra attention due to the accumulation of dirt, debris, and wax. There can also be underlying medical conditions which require you to clean their ears.
- One of the main reasons for cleaning your cat’s ears is to prevent the occurrence of ear infections. Excessive wax or trapped debris can create a favorable environment for bacteria or fungi to thrive, leading to painful infections.
- Cats are unable to reach the inner ear canal. If debris or other harmful substances enter the ear canal, they will be unable to deal with it.
- Ear mites are a common issue in cats, especially those that spend time outdoors or interact with other animals. These tiny parasites can cause irritation, itching, and inflammation in the ears. Cleaning your cat’s ears can help detect and eliminate ear mites, preventing them from causing further harm.
- Cleaning your cat’s ears also allows you to monitor their ear health and detect any signs of abnormalities early on. This includes identifying redness, swelling, foul odor, or unusual discharge, which may indicate an underlying medical condition that requires veterinary attention.
The Advantages of Olive Oil
Using olive oil to clean your cat’s ears offers several advantages over other cleaning solutions.
- Firstly, olive oil is a natural and safe option that does not contain any harsh chemicals or additives that could potentially irritate your cat’s delicate ears. This is especially useful for cats with sensitive skin.
- The antioxidant and anti-inflammatory properties of olive oil can help to calm and heal any irritation or inflammation in your cat’s ears. This is a blessing for cats prone to allergies or suffering from dry, itchy skin. Applying a few drops of olive oil can provide relief and even speed up the healing process.
- Olive oil serves as a natural lubricant, making it easier to soften and loosen stubborn ear wax. This can help prevent the wax from building up and causing blockages, which can lead to discomfort or hearing problems for your cat. Useful for cats who produce excessive ear wax.
- The antimicrobial properties of olive oil help to inhibit the growth of bacteria and fungi, reducing the risk of ear infections.
When to Clean Your Cat’s Ears?
It is recommended to clean your cat’s ears during regular grooming sessions, as this is when your cat is already in a relaxed state. After brushing and massaging your cat, they are likely to be more comfortable and receptive to having their ears cleaned.
Choosing the right time of day for grooming can also play a big role.
Evening grooming sessions, particularly after playtime, can be advantageous as your cat may be tired and more willing to cooperate. By selecting a calm and quiet environment, free from distractions and excessive noise, you can create a soothing atmosphere that promotes relaxation for your cat.
Additionally, it is crucial to ensure that you are the only person present during the ear-cleaning process. Cats can be easily startled or anxious around unfamiliar individuals, so it’s best to clean their ears when they feel secure in your presence. This one-on-one interaction fosters trust and minimizes any potential stress or discomfort.
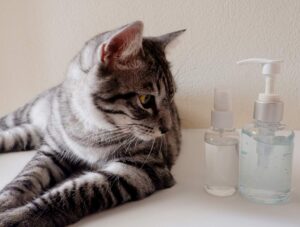
Gathering Your Tools
When it comes to cleaning your cat’s ears, it’s important to be well-prepared with the right tools. Here are the essential items you’ll need:
- Pure Olive Oil: Opt for a high-quality, pure olive oil that is free from any additives or fragrances. Olive oil serves as a natural and safe cleaning agent for your cat’s ears. It helps to soften earwax and debris, making it easier to remove during the cleaning process. Additionally, olive oil has soothing properties that can help alleviate any irritation or discomfort in your cat’s ears.
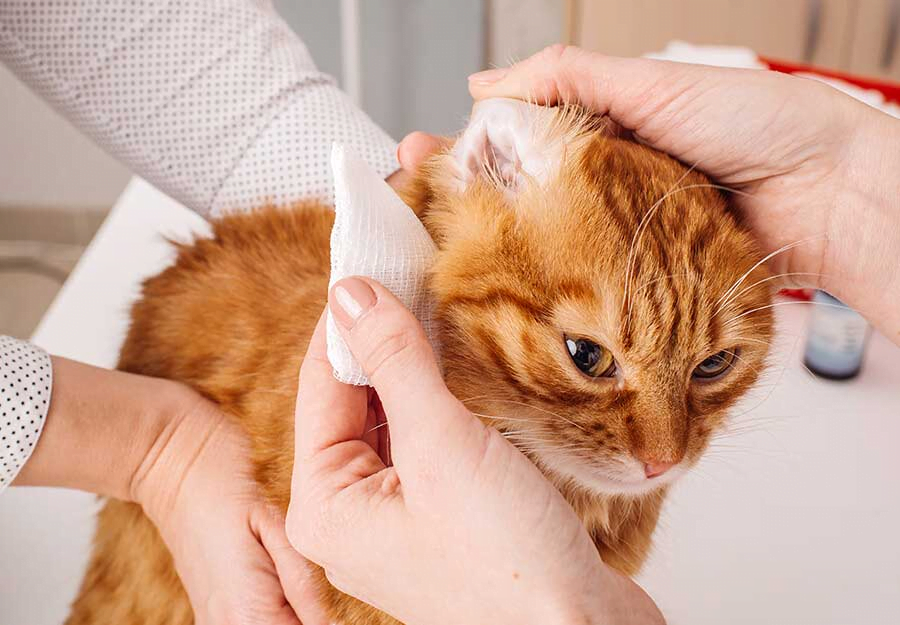
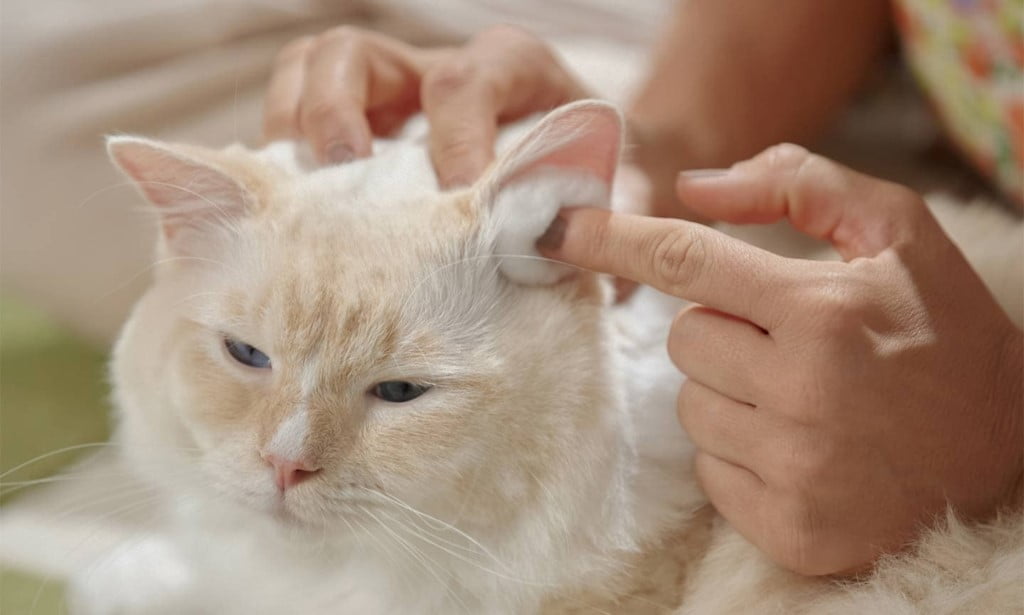
- Cotton Ball or Soft Cloth: Choose a soft and gentle cotton ball or a soft cloth to apply the olive oil and clean your cat’s ears. These materials are suitable for removing excess wax and dirt from the outer part of the ear. Make sure they are clean and free from any particles that could further irritate your cat’s ears.
- Dry Towel: Keep a dry towel nearby to gently pat and dry your cat’s ears after cleaning. This helps to remove any remaining moisture and prevent any potential discomfort or infection.
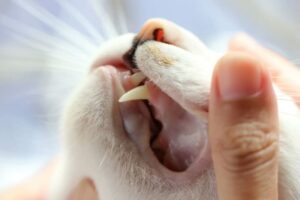
It’s crucial to avoid using cotton swabs or any sharp objects in your cat’s ears. These can cause injury to the delicate ear canal and should be strictly avoided.

Preparing Your Cat
Before you begin cleaning your cat’s ears, it’s essential to make sure they are calm and relaxed. Some cats may not enjoy having their ears cleaned, so it’s best to do it when they are calm and relaxed. You can also try giving your cat a treat or some playtime before starting the cleaning process to make the experience more pleasant.
If your cat is already agitated or stressed, delay their ear cleaning until they are feeling better. It is imperative that your cat remains calm during the process.
Even a slight mishap while cleaning their ears could result in fatal damage. Therefore, assess your cat’s mood before you begin the procedure.
Cleaning Your Cat’s Ears with Olive Oil
Step 1: Warm the Olive Oil
To ensure your cat’s comfort during the ear cleaning process, it is essential to warm the olive oil to match their body temperature. Begin by placing the container of olive oil in a bowl of warm water. Allow it to sit for a few minutes until the oil reaches a comfortable and gentle warmth. Warming the oil helps to prevent any discomfort or shock caused by the application of cold liquid into the sensitive ear canal.
Remember, cats are sensitive to temperature changes, so ensuring the oil is warm will create a more pleasant experience for your furry friend. Once the oil is warmed, proceed to the next step with confidence, knowing that you have taken an important step towards a successful and comfortable ear cleaning session.
Step 2: Administer the Olive Oil
With your warmed olive oil ready, it’s time to apply it to your cat’s ear. Using an ear dropper or syringe, carefully position the dropper or tip of the syringe at the opening of your cat’s ear canal. Remember to be gentle and avoid inserting the dropper or syringe too deeply, as this could cause discomfort or injury.
Slowly squeeze the dropper or syringe to release 1-2 drops of the warmed olive oil into the ear canal. Take your time and ensure that the drops are evenly distributed. The oil will work its way down the ear canal, helping to loosen and dissolve any dirt, debris, or excess wax.
Step 3: Massage the Ear
Once you’ve administered the oil, it’s time to give your cat’s ear a gentle massage. Using your fingertips, start at the base of the ear and gently massage in circular motions. This helps to distribute the oil throughout the ear canal and encourages the natural cleaning process.
The circular motion stimulates the ear’s glands, promoting the movement of any trapped dirt, wax, or debris. Be mindful of your cat’s comfort and adjust the pressure accordingly. A gentle massage not only aids in the effectiveness of the cleaning process but also provides a soothing and comforting experience for your feline friend.
Step 4: Repeat for Both Ears
To ensure comprehensive ear cleaning, repeat the process of adding olive oil and massaging for the other ear. Each ear should receive equal attention and care to promote optimal ear hygiene. Follow the same steps of warming the oil, administering it into the ear canal, and gently massaging the base of the ear in circular motions.
By addressing both ears, you ensure that any dirt, debris, or excess wax is thoroughly removed, leaving your cat with clean and healthy ears. Remember to maintain a gentle touch and observe your cat’s comfort throughout the process.
Step 5: Allow Your Cat to Shake
After the application of olive oil and gentle massage, give your cat a few minutes to naturally shake its head. This natural shaking motion helps to dislodge any loosened dirt, wax, or debris from the ears. It’s important to provide a safe and contained area for your cat to shake, such as a designated space or a towel-lined surface.
By allowing your cat to shake, you facilitate the removal of any remaining oil and debris from the ears, ensuring a thorough cleaning. Observe your cat’s behavior during this time to ensure they are comfortable and not experiencing any discomfort.
Step 6: Clean the Outer Ear
Once the olive oil has had a few minutes to work its magic, it’s time to clean the outer part of your cat’s ear. Take a cotton ball or a clean towel and gently wipe the visible portion of the ear flap and the area around the ear canal. This helps to remove any excess oil, dirt, or debris that may have been dislodged during the shaking process.
Be sure to be gentle and avoid inserting anything into the ear canal, as this can cause harm to your cat. Remember, the goal is to clean the outer ear and remove any surface-level dirt or residue, not to go deep into the ear canal. Take your time and be thorough, ensuring that the outer ear is clean and free from any remaining debris.
Step 7: Remove Excess Oil
After cleaning the outer ear, it’s time to check for any remaining oil and ensure that your cat’s ear is free from excess moisture. Take a fresh cotton ball and gently blot the area around the ear to absorb any lingering oil.
Be careful not to press too hard or insert the cotton ball deep into the ear canal, as this can cause discomfort or injury. The goal is to remove any excess oil that may have accumulated during the cleaning process. By doing so, you help prevent potential irritation and maintain the cleanliness of your cat’s ear.
Conclusion
Cleaning your cat’s ears is an important part of cat care that should not be overlooked. Remember to always be gentle, use pure olive oil, and seek veterinary advice if you notice any signs of infection or irritation. Happy grooming!